How to Handle Water Damage Restoration in a Basement Effectively

Water Damage Restoration

A basement often feels like the safest place in a home, tucked away from daily activity and protected by layers of structure. Yet when water finds its way inside, that same space can quickly become one of the most vulnerable areas.

The signs may start subtly with damp walls, a musty smell, or small puddles forming along the floor. Left unaddressed, these issues can grow into serious damage that affects not only the basement but the entire property. Understanding how Salt Lake City Water Damage Restoration in a basement works is essential for protecting both your home and your peace of mind.

Why Basements Are Prone to Water Damage

Basements are naturally more susceptible to water intrusion due to their location below ground level. Soil surrounding the foundation can retain moisture, and when pressure builds, water may seep through cracks or weak points in the structure. Poor drainage systems and heavy rainfall can make the situation worse by allowing water to accumulate around the foundation.

In addition to external sources, internal issues such as plumbing leaks or faulty appliances can also contribute to basement water damage. Because basements are often less frequently used, problems may go unnoticed for longer periods. This delay allows water to spread and increases the severity of the damage.

Understanding why basements are at risk helps emphasize the importance of regular inspections and early intervention.

Initial Inspection and Assessment

The first step in basement water damage restoration is a thorough inspection. This stage involves identifying the source of the water and evaluating the extent of the damage. Moisture can travel through walls and flooring, making it important to assess both visible and hidden areas.

Inspection also includes determining the type of water involved. Clean water from a plumbing issue is less hazardous than contaminated water that may carry harmful substances. This distinction affects how the restoration process is carried out.

A detailed assessment provides a clear understanding of what needs to be addressed. It ensures that all affected areas are included in the restoration plan and helps prevent future issues.

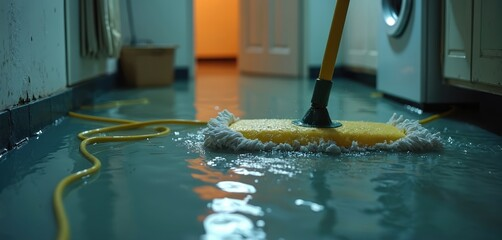
Water Removal and Extraction

Once the inspection is complete, the next step is removing any standing water. Basements can accumulate significant amounts of water, especially after heavy rainfall or flooding. Prompt removal is essential to prevent further damage.

Water extraction involves removing moisture from floors, walls, and any items stored in the basement. Carpets, furniture, and other materials may retain water even after visible pooling is gone. Addressing this residual moisture is critical for reducing drying time and preventing additional damage.

Efficient water removal is the foundation of the restoration process. It stops the spread of water and prepares the space for the next stages.

Drying and Dehumidification

After water removal, the focus shifts to drying and dehumidification. Basements can trap moisture due to limited airflow, making this stage especially important. Proper drying ensures that all remaining moisture is eliminated from the environment.

Air circulation and humidity control play a key role in this process. Moisture must be drawn out of walls, floors, and other materials to create a stable and dry space. Monitoring is necessary to ensure that moisture levels return to safe ranges.

Drying a basement may take time, particularly if water has penetrated deeply into structural components. Patience and thoroughness are essential to achieving effective results.

Cleaning and Sanitizing the Basement

Water damage in a basement often introduces contaminants and odors that must be addressed. Cleaning and sanitizing are essential steps in restoring a safe and healthy environment. This stage involves removing debris, disinfecting surfaces, and treating any areas affected by bacteria or mold.

Odor removal is also a key part of this process. Musty smells can indicate hidden moisture or microbial growth. Addressing these odors helps improve air quality and ensures that the space is comfortable to use again.

In some cases, materials that have been heavily affected may need to be removed and replaced. This prevents contamination from spreading and supports a more effective restoration process.

Repairing Structural and Interior Damage

Once the basement is clean and dry, the next step is repairing any damage that has occurred. This can include fixing cracks in walls, replacing damaged flooring, and restoring insulation. Structural repairs are particularly important in basements, as they help maintain the integrity of the foundation.

Interior restoration focuses on returning the space to its original condition. This may involve repainting walls, installing new materials, and ensuring that all systems are functioning properly. Attention to detail is important to create a finished result that is both functional and visually appealing.

Repairing damage completes the restoration process and allows the basement to be used safely once again.

Preventing Future Basement Water Damage

Preventing future water damage is a crucial part of maintaining a basement. Addressing vulnerabilities such as cracks in the foundation and improving drainage systems can significantly reduce the risk of water intrusion. Ensuring that gutters and downspouts direct water away from the property is also important.

Managing indoor humidity levels can help prevent moisture buildup. Proper ventilation and the use of dehumidifiers can create a more stable environment. Regular inspections allow for early detection of potential issues, making it easier to address them before they become serious problems.

Taking proactive steps helps protect the basement and ensures that the results of restoration are long lasting.

The Importance of Acting Quickly

Time is a critical factor when dealing with basement water damage. The longer water remains in the space, the greater the risk of structural damage and mold growth. Acting quickly helps limit the extent of the damage and reduces the overall restoration effort.

Prompt action also improves the effectiveness of each stage of the process. Water removal is easier when damage is recent, and drying is more efficient when materials have not been saturated for long periods.

Recognizing the signs of water damage and responding immediately can make a significant difference in the outcome.

Final Thoughts

Water damage restoration in a basement requires a thorough and methodical approach. From inspection and water removal to drying, cleaning, and repairs, each step plays a vital role in restoring the space to a safe and functional condition. Basements present unique challenges due to their location and susceptibility to moisture, making proper restoration essential.

By understanding the process and taking preventive measures, it is possible to protect a basement from future damage and maintain a stable environment. Acting quickly, addressing issues thoroughly, and staying proactive all contribute to a successful restoration outcome. In the end, restoring a basement is not just about fixing damage but about preserving the strength and security of the entire property.

How to Repair Minor Damage to Refinished Cabinets

Cabinet Refinishing San Jose CA

If your cabinets are scuffed, scratched, or faded, they can be improved with some simple DIY repairs. This article will discuss the most common types of cabinet damage and how to fix them.

Light scratches can be covered with wood or furniture touch-up markers, which are easily available online and in hardware stores. For deeper dents, wet a cloth and iron over the spot until it flattens. Visit Cabinet Refinishing San Jose CA for more information.

Scratches

Scratches on wood cabinets are a natural part of everyday life, and they can range from light marks that only affect the finish to deep gouges that penetrate into the surface layer and expose raw wood. Depending on the depth of the scratch, it may be possible to repair it using home-based techniques. For light scratches, it’s recommended to find a cabinet or wood marker that closely matches the color of the existing stain and apply it to the area. After the mark is filled, a furniture polish can be applied to blend it into the surrounding wood and enhance its appearance.

If the scratch is deeper, you’ll need to use more extensive methods to repair it. It’s important to assess the severity of the damage before attempting any at-home repairs, as scratches that penetrate into the wood can lead to further damage such as swelling, warping, and rot.

For more significant scratches, a professional should be called to handle the repair. They’ll have the necessary tools and skills to seamlessly repair the damaged area, restoring the cabinet’s appearance and maintaining its value and functionality. In addition to providing a flawless repair, they’ll also ensure the affected area is properly reinforced, preventing future damage and improving its durability. For example, a professional can apply a polyurethane coating to the affected area to protect it against further harm.

Dents

Cabinets are a big investment in any kitchen and provide essential storage space for dishes, pots, pans, and utensils. They also make your kitchen feel more open and spacious. But cabinets are not indestructible and, like anything else, will suffer some damage over time from heavy use. While a good RTA cabinet company can restore or camouflage most scratches, dents, and chips, they may not be able to fix deeper damage. Depending on the severity and type of damage, you might be able to do some simple repairs yourself.

For example, if your cabinets have a minor dent in the wood you can probably solve it at home with a cloth and a household iron. Start by wetting the cloth and then putting it over the dent. Then, run a hot iron over the area for 30 seconds. This steam helps the wood fibers expand and raise the dent back to its original shape.

However, if your cabinets have a more significant dent in the wood or are made with solid-core veneer, this method will not work. In this case, it is probably best to hire a professional.

Similarly, you can usually repair light scratches with some basic tools found around the house. If your cabinet is finished with a glossy polyurethane, try buffing the scratch with steel wool and then applying some furniture touch-up markers in the same color as the cabinet. Once dry, lightly sand the area to smooth it.

For deep scratches or gouges in your cabinetry, you can fill the scratch with a wood filler and then sand it down to match the texture of the surrounding surface. You can then apply a paint or stain to finish the repaired area.

While most cabinet refinishing companies can restore or camouflage most types of light damage, many cannot do much for deeper dents, gouges, cracks, or rotted wood. If you are dealing with serious damage, it is probably best to hire a woodworking contractor that specializes in cabinet restoration. For instance, the team at N-Hance is experienced with both refinishing and restoring cabinets. Contact them today to learn more about their services and how they can improve the look of your cabinets.

Gouges

Scratches on wood cabinets range from shallow marks that only disrupt the finish to deep gouges that expose the raw wood. A professional can fill these scratches with wood filler or putty that matches the color of the cabinet. Once dry, the area is sanded and buffed to blend in seamlessly with the rest of the cabinet’s surface.

Holes and splits in wood furniture can be repaired by using carpenters’ glue to bond a piece of patching wood to the damaged area. This is then trimmed to fit perfectly and sanded down smooth so that it’s impossible to detect.

Assessing the severity of damage is an important step in deciding whether to repair or replace. Significant structural damage, severe water damage, or issues that affect functionality may be a sign that the cabinets are no longer functional or desirable. A professional can provide advice and guidance to help you decide what the best course of action is for your home. Repairing often is a more cost-effective option than replacement. However, if the cost of frequent or extensive repairs starts to add up, it might be a better idea to consider replacement.

Loose Hardware

It’s frustrating when you go to grab a pan and notice that a cabinet knob is loose or the handle on your oven door keeps wagging in the breeze. Fortunately, these types of problems can usually be fixed easily and quickly. For loose cabinet handles or knobs, simply tighten the screw that holds it. Be sure not to over-tighten, however, as this can damage the surface of the wood or cause the screw to strip (making it no longer able to grip). If the problem persists, you may want to try filling the stripped screw hole with either a toothpick or some kind of construction adhesive before reinserting the screw.

Scratches and dents can also be repaired quite easily with a little bit of time and effort. For deep scratches, you can use a wood filler that matches your cabinet’s color to patch up the damaged area. For lighter scratches, a furniture touch-up marker works well. You can also lightly sand the repaired areas once they are dry to smooth out the finish.

If your cabinet doors are squeaky or bang loudly when you close them, it’s often as easy as installing some peel-and-stick soft padding. These pads, also known as door bumpers, help to soften the impact and prevent the doors from slamming shut or hitting the frame of the cabinet.

Lastly, if your cabinets are beginning to show signs of wear and tear, it’s worth checking in with a professional to discuss options for refinishing or replacing them. In some cases, extensive rot or termite damage may necessitate replacement of entire sections of cabinetry. In these instances, a skilled refinisher can usually restore or replace the affected area to look as good as new.

By following some simple maintenance tips, you can keep your refinished cabinets looking beautiful for years to come. Regularly cleaning your cabinets with a gentle degreaser or baking soda mixture helps to remove built-up grime and protects against moisture damage. Wiping up spills as soon as they occur and using coasters or pads under heavy appliances can help to prevent stains. Finally, regularly lubricating hinges and drawer slides with a silicone-based lubricant can prevent squeaks and ensure that they operate smoothly.